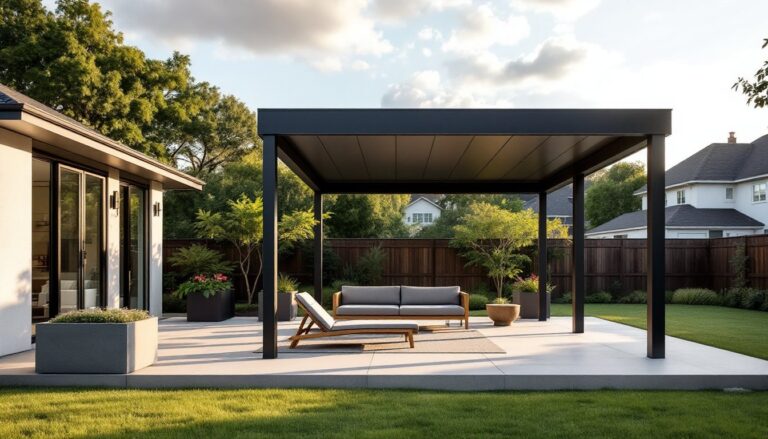

Setting up a home gym in the backyard has moved from novelty to practical necessity for homeowners who want to train on their own schedule without commuting to a fitness facility. The beauty of a backyard gym is that it doesn’t require fancy equipment or a huge investment, just smart planning and the right fundamentals. Whether someone’s building a modest cardio corner or a full-fledged strength-training setup, a backyard gym works best when it’s designed for both function and longevity. This guide walks through equipment choices, layout planning, installation steps, weatherproofing, and storage so anyone can create a fitness space that actually gets used.
Table of Contents
ToggleKey Takeaways
- Backyard gym ideas start with essential equipment like adjustable dumbbells, a pull-up bar, resistance bands, and a bench—items that unlock hundreds of exercises without a massive budget or floor space.
- Proper layout planning with designated zones for cardio, strength work, and stretching prevents injuries and ensures everyone’s safety, especially when maintaining 8 feet of vertical clearance for overhead movements.
- A rubber mat foundation (½-inch thickness, 4×6 feet minimum) is non-negotiable for protecting equipment, reducing noise, and creating a finished look that encourages regular use.
- Weatherproofing your outdoor fitness area extends equipment lifespan through weekly sweeping, quarterly bolt inspections, and strategic storage of sensitive items during off-season months.
- Smart vertical and ground storage solutions keep the backyard gym tidy and functional, with wall-mounted racks, pegboards, and weatherproof storage chests preventing clutter and neglect.
Essential Equipment for a Budget-Friendly Home Gym
Cardio and Strength Training Basics
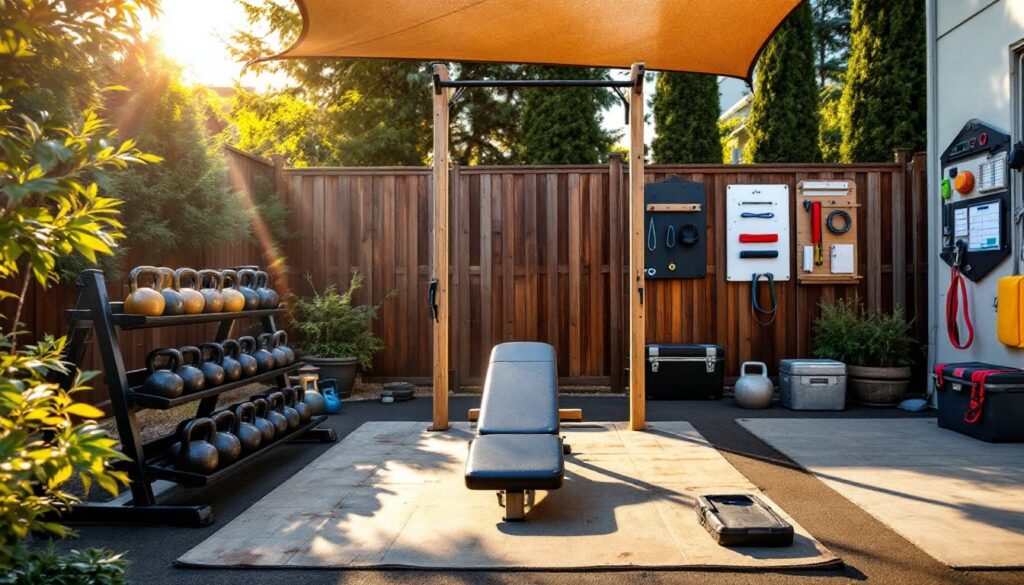
Starting a backyard gym doesn’t mean buying everything at once. The core equipment that delivers the most bang for buck includes adjustable dumbbells, a pull-up bar, resistance bands, and a flat or adjustable bench. These four items alone unlock hundreds of exercises without requiring much floor space.
For cardio, a jump rope costs under $30 and burns serious calories in short bursts. If the budget stretches further, a used treadmill or stationary bike adds low-impact options, scour local classifieds or Facebook Marketplace first before buying new. Quality used cardio equipment is often available at a fraction of the original price because people abandon their resolutions.
Kettlebells deserve their own line item. A 35-pound kettlebell runs $40–70 and works for swings, Turkish get-ups, snatches, and goblet squats. One or two kettlebells solve a surprising number of workout problems. Backyard Transformations Tools: Essential Equipment for Your Outdoor Makeover often includes lifting equipment recommendations tailored to outdoor durability.
Don’t overlook flooring. A basic rubber mat (½-inch thickness, 4×6 feet minimum) protects equipment, reduces noise for neighbors, and gives a finished look. Recycled rubber mats cost less than virgin rubber and perform equally well. Weight needs to sit on something solid, concrete shifts slightly over seasons, and mats dampen vibration that rattles door frames in nearby houses.
Designing Your Backyard Gym Layout
Space Planning and Safety Considerations
Before buying anything, measure the available space and account for clearance. A homeowner needs at least 8 feet of vertical clearance for pull-ups and overhead presses, if the patio ceiling is lower, pick a different zone. Mark out the footprint on the ground using chalk or rope: visualize how the sun hits at different times of day (training in afternoon shadow beats training in direct heat).
Layout strategy divides the space into zones: cardio in one corner, strength work in another, and stretching/cooldown on a bench away from traffic. This prevents someone doing burpees from knocking into someone doing rows. Keep the pull-up bar accessible but not in a walkway, a person doing a failed rep or kipping pullup needs “fall space.”
Safety isn’t negotiable. Post a simple no-entry rule during training windows if kids or pets are around. Verify that the ground is level, a sloped surface causes uneven weight distribution during lifts and increases injury risk. Check for overhead obstacles: tree branches, power lines, gutters, or anything that could be struck during movements. Backyard Transformation Techniques: Simple Ways to Reimagine Your Outdoor Space emphasizes layout planning that balances functionality with safety.
Consider drainage. If the backyard slopes or pools water during heavy rain, choose the highest ground or install a simple French drain around the mat perimeter. Water-logged equipment rusts and mildew grows on rubber. Ensure foot traffic to and from the gym doesn’t track mud onto patios or into the house.
DIY Gym Setup: Step-by-Step Installation Guide
Most backyard gym setups come together in a weekend without special skills. Here’s the practical path:
1. Prepare the ground. Clear debris, remove large rocks, and rake the area smooth. If grass is present, consider laying down a landscape fabric before the rubber mat to suppress weeds and improve drainage. Fabric comes in 3–4 foot widths and costs $0.20–0.50 per square foot.
2. Lay the mat foundation. Unroll the rubber mat and weigh down corners with sandbags or cinder blocks so it doesn’t curl up in the sun. Make sure seams are snug and edges don’t create a tripping hazard. If using multiple mat pieces, use mat connectors ($10–15 per corner) so they don’t shift.
3. Install the pull-up bar. If mounting to a post or tree, use a galvanized steel pull-up bar attachment kit (available online, $30–80). Galvanized finish resists rust better than bare steel. Mount the bar at a height where someone can hang with knees slightly bent, typically 7 feet from the ground. Use lag bolts rated for at least 500-pound pull-out strength and drill into solid wood: never mount to vinyl siding or weak materials. If using a free-standing pull-up rig, make sure the base is bolted or weighted, a wobbling bar is both unsafe and ineffective.
4. Position the bench. Place the adjustable bench on the mat, ensuring all four feet make solid contact. If the bench wobbles, shim it with rubber shims (not wood blocks, which absorb water and rot).
5. Organize dumbbells and kettlebells. Use a simple rack or dumbbell tree so weight sits stable and organized. Loose weights rolling across the mat create tripping hazards and damage the surface. The Handyman’s Daughter has excellent tutorials on building custom weight racks from steel pipe if someone wants a budget DIY option.
6. Test stability and safety. Before the first workout, apply force to every piece: tug the pull-up bar, push the bench, shift the mat edges. There should be zero movement or flexing. Any looseness means assembly wasn’t tight enough.
Weatherproofing and Maintaining Your Outdoor Fitness Area
Unlike a garage gym, outdoor equipment faces sun, rain, and temperature swings. Protection extends lifespan and keeps the space functional year-round.
Rubber mat care: Sweep debris weekly and hose down every few weeks to prevent mold and algae growth in humid climates. If black mold spots appear, scrub with a 10:1 water-to-bleach solution and rinse thoroughly. Don’t let water pool on the mat, ensure the ground slopes slightly away or install a perimeter drain. In winter, salt from snow can degrade rubber: rinse the mat after snow melt.
Metal equipment: Galvanized pull-up bars resist rust well, but fasteners can corrode. Inspect bolts quarterly and apply a thin coat of dry lubricant spray (like WD-40) if you notice any surface rust beginning to form. Don’t use oil-based lubes outdoors, they attract dirt and become sticky. Dumbbells with rubber coatings should be stored under a weatherproof cover when not in use: exposed rubber can fade and crack in direct UV. Bring adjustable dumbbells indoors if storing longer than a few weeks.
Bench maintenance: Wipe down the bench after rain to prevent algae growth on the padding. If the padding becomes saturated, drill small drainage holes in the underside or use a bench cover during off-season months. Ana White provides excellent tutorials on sealing and finishing wood benches if someone builds a custom DIY bench.
Seasonal considerations: In freeze-thaw climates, concrete pads expand and contract, so mats may shift seasonally. Recheck levelness in spring after the frost heaves. In very hot climates, rubber mats can become slippery from morning dew: place a non-slip mat topper or use chalk on hands before training.
Shade and sun exposure: Direct afternoon sun in summer can make equipment uncomfortable to grip and fade painted surfaces. If possible, orient the gym to catch morning sun (energizing without intense heat). A shade cloth attached to poles above the mat area ($30–80) works if trees aren’t available. It also protects the mat from UV degradation.
Creative Storage Solutions for Gym Equipment
A tidy gym is one that gets used. Without smart storage, equipment sprawls, collects dust, and signals neglect.
Vertical storage: Wall-mounted dumbbell racks and resistance band hooks reclaim floor space. Mount a pegboard (4×8 feet) on a fence or wall and hang lighter accessories: jump ropes, ab wheels, gloves, and towels. Pegboards cost $25–60 and let you arrange items exactly how you want them. Use weatherproof pegboard hooks rated for outdoor use.
Ground storage: A waterproof storage chest or deck box ($60–150) holds small items that shouldn’t stay outside year-round: phone, water bottle, knee sleeves, lifting straps. Look for boxes with rubber gaskets to keep moisture out. Alternatively, a simple plastic utility cabinet (30 inches wide, 36 inches tall) fits beside the gym and provides shelved storage for supplements, first-aid supplies, and extra padding.
Dumbbell and kettlebell organization: A tiered dumbbell rack or dumbbell tower keeps weights neatly stacked and accessible. If building from scratch, Backyard Transformations for Beginners: suggests using industrial shelving units (metal, not wood, to avoid rot) rated for the weight. Standard metal shelves handle 150–200 pounds per shelf and cost under $100 for a 4-shelf unit.
Cardio machine storage: If the gym includes a treadmill or bike, keep the instruction manual in a laminated sleeve hung on a fence or stored in a weather box. Note maintenance schedules (belt tension, lubrication) on a waterproof card so someone doesn’t skip upkeep.
Seasonal shutdown: Before winter or extended off-season, store valuable equipment indoors if possible. Cover the mat with a tarp (secure all edges so wind doesn’t flip it) and drain or run vinegar through any water-based equipment. Backyard Transformation Strategies: Turn recommends creating a simple maintenance checklist posted inside the storage area so equipment stays ready.