
Backyard pavers have moved far beyond simple gray concrete rectangles. Today’s homeowners are embracing permeable materials, geometric patterns, and integrated hardscaping that turns a plain yard into a sophisticated outdoor room. Whether you’re updating an existing patio or building from scratch, modern paver design offers real-world solutions for drainage, durability, and visual appeal. This guide walks you through contemporary paver materials, layout strategies, and installation methods that work whether you’re hiring help or going solo with your tools.
Table of Contents
ToggleKey Takeaways
- Modern backyard paver ideas go beyond standard concrete, incorporating permeable materials, geometric patterns, and porcelain finishes that enhance drainage, durability, and visual appeal.
- Permeable pavers reduce stormwater runoff and prevent standing water, making them both eco-friendly and compliant with regulations in many jurisdictions.
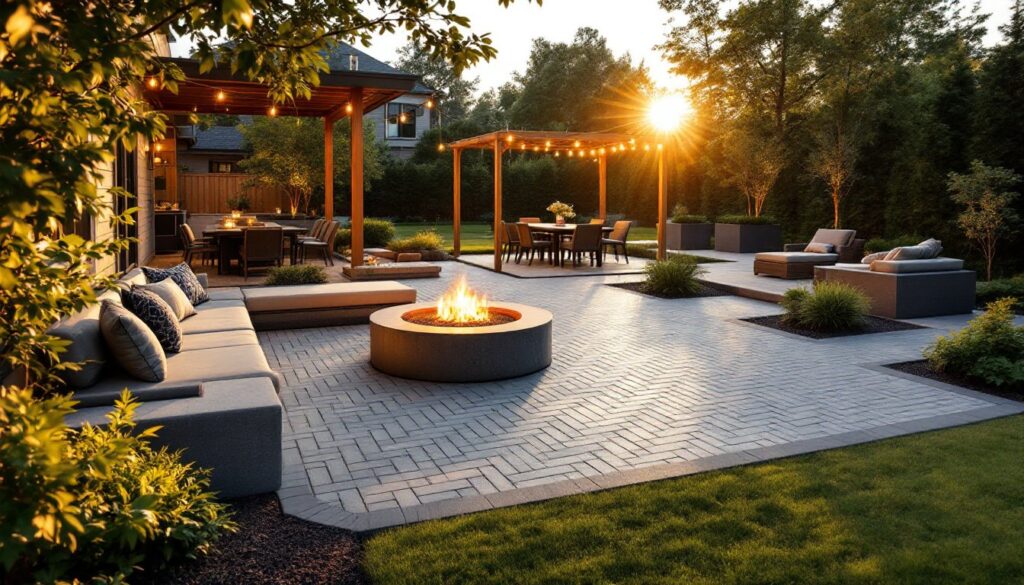
- Contemporary paver patterns like herringbone, running bond, and linear geometric grids create visual interest and define outdoor living zones without expensive renovations.
- Color contrast and textural combinations—such as pairing honed and brushed finishes or blending warm charcoals with taupes—wake up flat yards and add sophistication to outdoor spaces.
- Proper installation requires a compacted 4–6 inch gravel base, correct slope (1/4 inch per 4 feet for sitting areas, 1/8 inch for pathways), and polymeric sand joints to prevent shifting and uneven pavers.
- DIY paver installation works for projects under 500 square feet, costing $8–$15 per square foot in materials, while professional labor typically runs $15–$30 per square foot depending on pattern complexity and location.
Contemporary Paver Materials and Finishes
Modern outdoor spaces demand pavers that perform as hard as they look. Concrete pavers remain the workhorse, affordable and available in countless profiles, but today’s options go deeper. Porcelain pavers deliver a refined aesthetic with superior freeze-thaw resistance, making them ideal for northern climates. They mimic natural stone without the maintenance headaches of travertine or bluestone.
Permeable and Eco-Friendly Options
Permeable pavers are no longer niche: they’re becoming standard in climate-conscious builds. These pavers let water drain through joints or the unit itself, reducing runoff and recharging groundwater. Permeable concrete pavers, recycled plastic composites, and porous asphalt are the main categories.
Permeable concrete units look similar to standard pavers but contain aggregate spacing that allows water infiltration. Installation requires a crushed stone base (typically 4–6 inches) and often a geotextile fabric underneath to prevent soil migration. The real win: no standing water after rain, fewer mosquitoes, and compliance with stormwater regulations in many jurisdictions.
Recycled plastic pavers cost slightly more upfront but last 25+ years with minimal upkeep. They don’t absorb moisture, won’t crack in freeze cycles, and won’t stain. Homeowners pairing them with permeable gravel joints get both eco-credentials and low maintenance.
Aggregate finish pavers (exposed stone on the surface) provide slip resistance, a smart choice around pools or wet areas. Honed finishes feel smoother underfoot but require sealing every 2–3 years to resist staining. Brushed finishes sit in the middle: durable and subtly textured.
Geometric and Linear Paving Patterns
The days of simple grid layouts are fading. Contemporary designs leverage geometry to draw the eye and define space. Herringbone remains popular because it’s visually dynamic and structurally stable, the offset bond distributes load well. Lay pavers at 45-degree angles in a V-pattern: it takes patience but the result feels intentional.
Running bond (offset rows, like brickwork) is simpler to install and equally modern, especially in contrasting colors. Pair light and dark pavers in alternating rows for a subtle stripe effect.
Circular or fan patterns work well around fire pits or focal points. These demand more cuts and grout work, so they’re trickier DIY. A wet saw with a diamond blade makes notching easier, but hand-cutting pavers is slower and generates dust, wear a P100 respirator and damp-cut when possible.
Linear geometric grids, think large rectangles arranged in a staggered pattern, suit modern homes with clean lines. The key is precision: measure twice, cut once. A framing square and chalk line keep rows straight.
Whichever pattern you choose, account for 1/8-inch to 1/2-inch joints (depending on your style preference and paver size). Wider joints let you adjust for imperfect materials: narrower joints feel sleeker but demand tighter cuts. Calculate waste at 8–10% above your square footage, cuts and breakage always happen.
Creating Visual Interest With Contrasting Colors and Textures
Flat gray pavers flatten a yard. Contrast wakes it up. Modern palettes blend warm charcoals with lighter taupes, or pair cool slate tones with cream accents. Backyard Transformation Ideas often feature a primary paver color (typically 70% of the surface) anchored by accent bands or insets (20% secondary, 10% accent detail).
Textural mixes add sophistication. Combine honed and brushed finishes in the same color family for subtle depth. Layer in permeable gravel joints between pavers for a sophisticated, broken-joint look that’s easier to maintain than traditional mortar.
When sourcing pavers, inspect samples in both sunlight and shade. Colors shift dramatically depending on time of day and moisture. Darker pavers get hot underfoot in summer sun: lighter ones show dirt and algae more readily. Aim for a middle tone if aesthetics matter equally to practicality.
Sealing is worth mentioning here. Most concrete and natural stone pavers benefit from an acrylic or penetrating sealer applied 6–12 months after installation (after joints have cured). Sealer deepens color, resists staining, and eases cleanup. Reapply every 2–3 years depending on traffic and climate. Porcelain and high-quality concrete rarely need it: permeable pavers shouldn’t be sealed, as it blocks drainage.
For bold visual statements, inlay accents, thin strips or borders in contrasting materials, guide the eye and define zones without major expense.
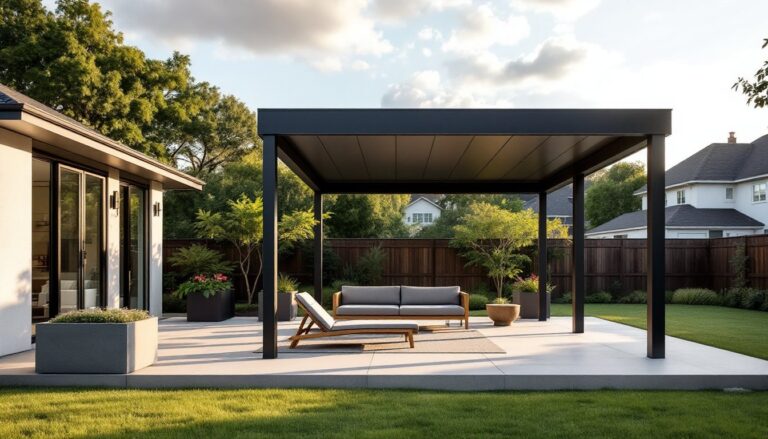
Integrated Outdoor Living Zones
Modern yards don’t sprawl in one direction. They compartmentalize. Pavers define these zones better than anything, visually and functionally.
A dining zone sits closest to the kitchen, typically 12–16 feet wide to accommodate a table and chairs plus foot traffic. Use a consistent paver pattern here: it signals “gathering space.” Edge it with a change in texture or a thin contrasting band.
A lounge or conversation area flows next, often larger (16–20 feet) and slightly sunken or raised via a retaining wall (if building up). This psychological separation makes the space feel intentional. How To Transform Your Backyard often balances paved zones with planted beds to soften hard edges.
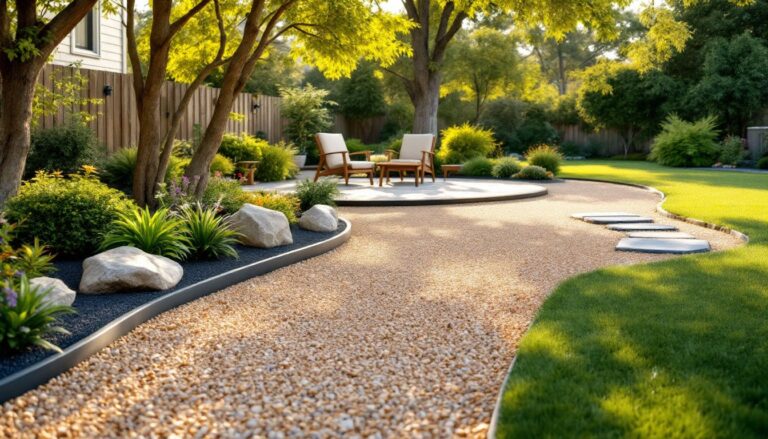
Pathway pavers connect these zones. Narrow paths (3–4 feet) feel intimate: wider ones (4–6 feet) feel generous and allow two people to walk side-by-side. A meandering path is fine, but keep curves gentle, tight radius curves make furniture placement awkward.
Provide substrate variation: a firm, compacted base for dining and sitting areas (4–6 inches of gravel plus sand), but loosen it slightly under pathways to reduce fatigue. Sitting areas shouldn’t slope more than 1/4 inch per 4 feet (1:50 grade) to avoid furniture rocking and water pooling. Use a 2-foot level during installation to check.
Slope pathways slightly (1/8 inch per 4 feet minimum) to shed water. In freeze-thaw zones, this prevents ice buildup.
Lighting and Hardscaping Accents
Pavers alone don’t create atmosphere, lighting does. LED in-ground lights mounted flush with or recessed just below paver level mark pathways and hazards. Run low-voltage cable (12V) under the sand base during installation, trenched carefully so you don’t cut through it later. Spacing them 4–6 feet apart on pathways is standard: closer spacing wastes money and looks choppy.
String lights or bistro lights hung overhead between posts or trees soften the space at dusk. Install a weatherproof outlet (GFCI-protected, per NEC) near your patio zone for plugging in fixtures. This requires running an outdoor-rated wire from an interior panel, call a licensed electrician if you’re uncertain.
Hardscape accents anchor a paver design. A fire pit or outdoor fireplace centered in a seating area becomes the focal point. Wrap it with larger-diameter pavers or a permeable gravel ring (easier to install, softer on feet). Leave at least 10 feet of clearance to structures and vegetation for safety and draft.
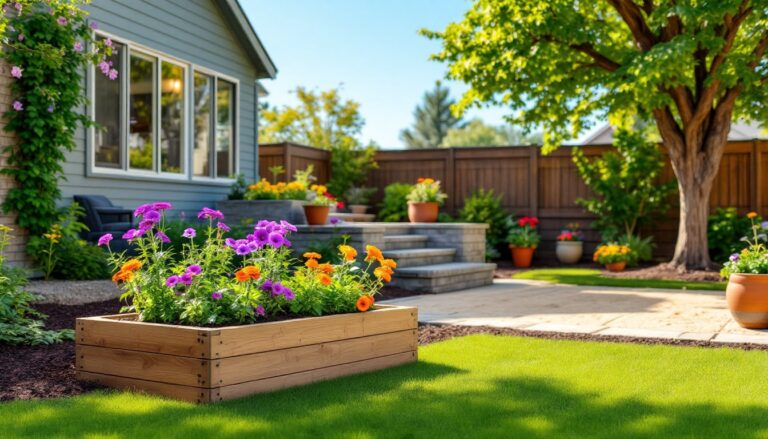
Raised planter beds (built from pressure-treated lumber, composite, or stone) break up paver expanses and define planting zones. Pair them with paved walkways for clean lines. A 12-inch or 18-inch height suits most gardens and reduces bending.
Outdoor furniture anchors zones visually. Weight-bearing pavers allow sturdy tables without wobbling. Avoid placing legs in joints, position furniture so legs rest on full paver units whenever possible.
Top Backyard Transformations to often layer multiple accent types, a water feature, firepit, and integrated seating wall, to create depth and visual interest.
Budget-Friendly DIY Paver Installation Tips
DIY paving is feasible for smaller projects (300–500 square feet) and experienced homeowners willing to invest time. Larger installs or complex patterns warrant hiring professionals, the labor savings rarely offset mistakes or equipment rental costs.
Core steps and prep are non-negotiable. Excavate the area 4–6 inches deep (depending on climate and traffic). Remove grass, roots, and soft soil. A rectangular shovel and mattock work for small yards: rent a plate compactor (about $50–$70 per day) for larger areas. Compact the soil base firmly, this prevents settling and uneven pavers later.
Lay 4 inches of crushed gravel (size 57 stone or similar) and compact again. This is your drainage layer and primary support. Skip this step and your pavers will shift after the first hard freeze or heavy rain.
Add 1 inch of polymeric sand on top, screeding it level with a straight 2×4 or level bar. Don’t compress this layer, the sand will settle under the weight of pavers. Lay pavers snug and level using a rubber mallet (striking concrete with a steel hammer can cause spalling). Check height frequently with a level.
Cutting is where most DIYers stumble. A wet saw with a diamond blade ($30–$50 to rent) is safer and faster than an angle grinder. Soak pavers slightly beforehand to reduce dust: always wear a P100 mask when cutting.
Once all pavers are placed, poly-sand the joints (the special sand locks when moistened). Sweep it into gaps, mist with water from a hose (don’t blast, water washes sand out), and repeat until joints are full. Let it cure 24–48 hours before heavy foot traffic.
For a natural, broken-joint appearance, use permeable gravel instead. Sweep pea gravel into gaps: it won’t lock but it will self-level and drain beautifully. Refresh it annually.
Estimate $8–$15 per square foot for DIY materials (pavers, base, sand, sealant). Labor costs from professionals typically run $15–$30 per square foot, depending on complexity and location. Permeable options run 10–20% higher than standard concrete.
<h2 id="” data-id=””>